Hip and ankle mobility for a better squat
If your squat feels like a fight every single rep, the problem is often not strength. Many people can already produce plenty of force in their legs, yet their depth is shallow, their heels lift off the floor, their chest folds forward, or their knees cave in. Those are not motivation problems. They are usually mobility problems, and the two joints most responsible are the hips and the ankles.
This guide explains why these two joints matter so much for squatting, gives you quick self-tests to find your own limitation, lays out a practical mobility routine in a clear table, shows you how to slot it into your warm-up, and finishes with the mistakes that keep people stuck. The aim is general education and better movement, not a diagnosis. If you have sharp pain, numbness, or a problem that lingers for weeks, please see a qualified physiotherapist or doctor rather than pushing through.
Why mobility decides squat quality
A squat is a coordinated bend at three joints at once: the hips, the knees, and the ankles. To sink straight down with an upright torso, your hips need to flex deeply and rotate slightly, while your ankles need to let the shin travel forward over the toes. When either joint runs out of range, your body does not simply stop. It borrows movement from somewhere else, and that borrowing is where bad squats come from.
Stiff ankles force the body to find depth by folding at the hips, which tips the chest toward the floor and shifts load onto the lower back. Stiff hips do the opposite: they cut your depth short and often pull the knees inward as you try to reach the bottom. In both cases the squat still happens, but the loading is uglier and less efficient. Mobility work is simply about giving the right joints enough room so the wrong ones stop compensating.
It is worth being precise here. Mobility is not the same as flexibility. Flexibility is how far a joint can be stretched passively. Mobility is how much usable, controlled range you have when you are actually moving and loaded. A squat needs the second kind, which is why static stretching alone rarely fixes a squat. You can learn more about that distinction in our guide on dynamic versus static stretching.
Quick self-tests to find your limitation
Before adding drills at random, find out which joint is actually holding you back. These two tests take two minutes and need no equipment.
The wall ankle test. Kneel facing a wall with one foot flat on the floor. Keep the heel down and try to push the knee forward until it touches the wall. Now slide the foot back until the knee just barely reaches the wall with the heel still glued down. Measure the gap from your big toe to the wall. Under about 8 to 10 cm usually points to limited ankle range on that side. Compare left and right, because differences are common.
The deep bodyweight squat test. Stand with feet roughly shoulder width and squat as low as you comfortably can with no weight. Watch for the heels lifting, the chest collapsing forward, or the knees diving inward at the bottom. Heels lifting hints at ankles. A heavy forward fold or an inability to reach depth with an upright torso hints at hips. If your squat is also tied to knee discomfort, our article on squat knee pain is a useful companion read.
Run both tests, note what you see, and let the results steer where you spend your time.
A mobility routine you can actually follow
Below is a compact routine that covers both joints. You do not need all of it forever. Use the self-tests to weight your effort toward your weaker link. Treat the numbers as a starting point, not a rule, and keep every drill in a range that feels like a stretch and never like pain.
| Drill | Targets | Dose | Key cue |
|---|---|---|---|
| Knee-to-wall ankle rock | Ankle | 10 reps each side | Heel stays down, drive knee over toes |
| Half-kneeling calf and ankle stretch | Ankle | 30 sec each side | Shift weight forward slowly |
| Deep squat hold | Hips and ankles | 30 to 60 sec | Sit tall, gently pry knees out with elbows |
| 90/90 hip rotation | Hip rotation | 8 reps each side | Move slowly, keep chest tall |
| World's greatest stretch | Hips and torso | 5 reps each side | Reach long, rotate through the upper back |
| Banded hip distraction | Hip socket | 30 to 45 sec each side | Let the band ease the joint back |
Done as a circuit, this is roughly five to eight minutes. On a heavy lower-body day you might do the full list. On other days, pick the two drills that target your weakest test result. Consistency over weeks matters far more than any single perfect session, and this kind of low-intensity work fits naturally into an active recovery day too.
How to put it into your warm-up
Mobility work earns its place at the start of a session, not as an afterthought. A simple order works well. Begin with two to three minutes of light cardio to raise your temperature, since warm tissue moves more freely. Then run your targeted mobility drills. Finally, move into warm-up sets of the actual lift so the new range gets rehearsed under light load. For the full structure, see our warm-up guide.
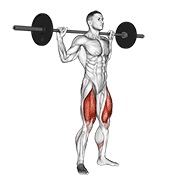
The point of finishing with the barbell full squat at light loads is important. Mobility you gain on the floor only transfers to your squat if you immediately practice squatting with it. Add an empty bar, then a light set or two, and consciously use your new range. This teaches your nervous system that the extra depth is safe and usable, which is the whole goal. Strong, well-conditioned legs help here, so general lower-body training in our upper legs category supports the work.
How long until it improves
People often want a timeline. Honest answer: it varies. Some restriction is purely tissue stiffness that loosens within a few sessions, while some is a motor-control issue your nervous system needs weeks to trust. A reasonable expectation is small, noticeable gains over two to four weeks of consistent work done three to five times per week. Mobility responds to frequency, so short and often beats long and rare. If weeks of honest effort change nothing, that is a signal to get a professional assessment rather than to try harder.
ข้อผิดพลาดที่พบบ่อย (Common mistakes)
- Stretching everything but never squatting. Floor drills only transfer if you then rehearse the squat itself with light load.
- Forcing depth with weight on the bar. Chasing range under heavy load before you own it is how form breaks down. Build the range first.
- Ignoring a side-to-side difference. One stiff ankle quietly skews your whole squat. Test both sides and address the weaker one.
- Holding long static stretches right before heavy sets. This can briefly dull power. Keep pre-lift work dynamic and save long holds for later.
- Quitting after a few days. Mobility is a frequency game measured in weeks, not a one-time fix.
คำถามที่พบบ่อย (FAQ)
Are weightlifting shoes a fix for stiff ankles? A raised heel reduces how much ankle range your squat demands, so it can help you squat well today. It is a useful tool, not a substitute for building real ankle mobility over time. Many people use both.
Can I just squat to a box instead? Box squats and limiting depth to a clean range are smart ways to train safely while you build mobility. Keep working the drills on the side, and let your usable depth grow gradually.
Is heel elevation cheating? No. Elevating the heels on a small plate is a legitimate way to train the pattern while your ankles catch up. Treat it as a stepping stone, not a permanent crutch.
สรุป (Summary)
Most stubborn squat problems trace back to the hips and ankles rather than to weak legs. Test yourself first, then spend your mobility time where you are actually limited, and always finish by rehearsing the squat with light load so the new range sticks. Keep it frequent, keep it gentle, and give it a few weeks. Ready to train it inside a real plan? Pick a session from our programs and squat better on your next leg day.
Ready to put this into action? Start with a program for your level.
View programs →